
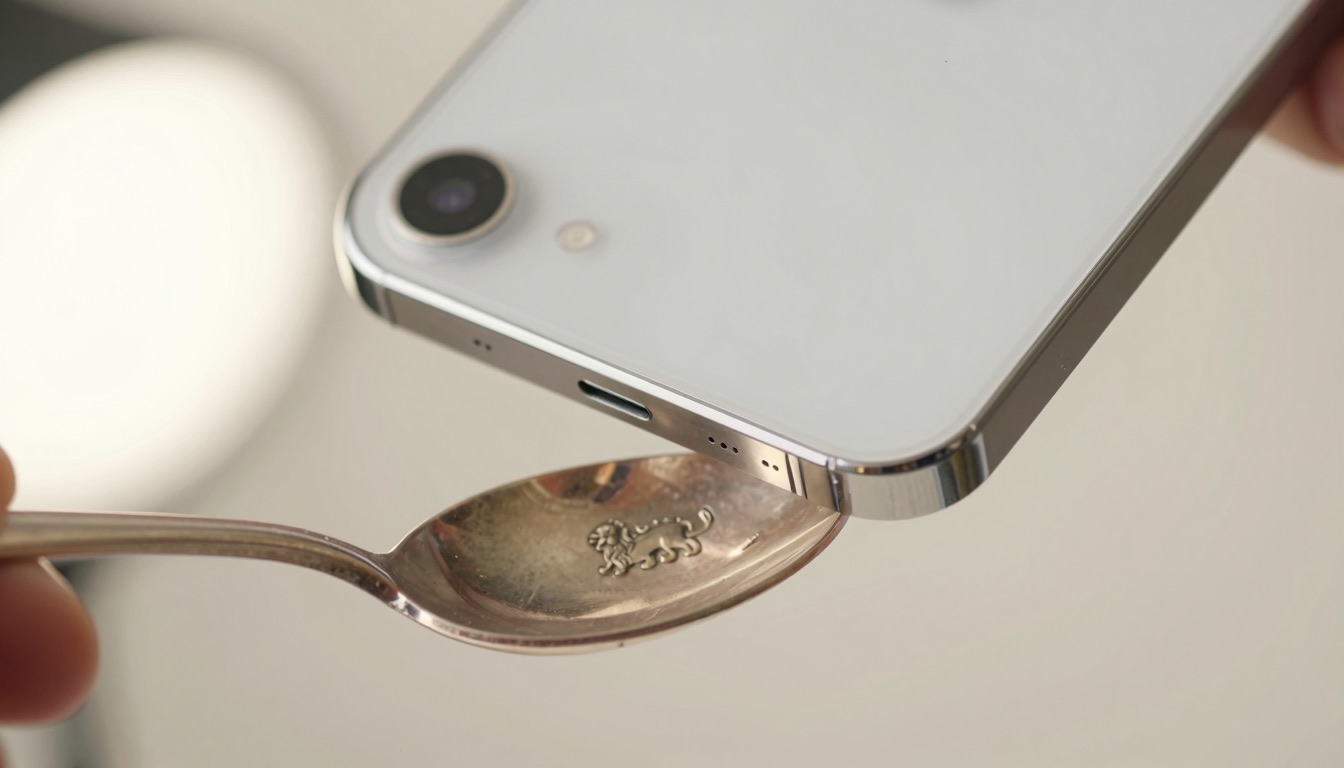
To scan a silver mark with your phone, fill the frame with the hallmark, diffuse the light to kill glare, and lock focus before you shoot.
Why your phone already reads hallmarks well
A modern phone camera out-resolves the loupe most dealers carry. Its sensor captures punch depth, shield shape, and the date letter in a single frame.
That resolution matters because a hallmark is tiny. A London date letter often stands under two millimetres tall. Your naked eye struggles. A 48-megapixel sensor does not.
Any seasoned collector knows the frustration of a mark that “almost” reads. The lion passant looks right, but the date letter blurs into the metal. A clean scan removes that guesswork.
Phones also beat the loupe on sharing. You photograph the mark once, then zoom, crop, and send it to an appraiser without handling the piece again.
Hallmark identification apps depend on this too. They feed your photo to a vision model trained on thousands of reference marks. The model is only as good as the pixels you hand it.
The catch is technique. A phone pointed carelessly at bright metal returns glare, soft focus, and a useless image. The hardware is ready. Method is what most people skip.
Consider a Georgian teaspoon assayed in London in 1799. Under raking side light, its four marks resolve cleanly on screen. Under a ceiling bulb, they vanish into a white reflection.
The difference is not the camera. It is how you light and frame the shot. For the meaning behind those four symbols, start with the silver marks guide.
A British mark in good condition can be dated to the exact year. The silver hallmarks chart turns a sharp date-letter scan into a single calendar year, which is the whole reason a readable image is worth the effort.
Takeaway: your phone has the resolution to identify most marks. Everything below is about getting that resolution onto the screen.
Set up your phone before you shoot
Camera settings decide whether a mark reads or blurs. Most phones default to settings that fight you on tiny, shiny subjects.
Start by cleaning the lens. A smudge of fingerprint oil softens every fine line in the mark. A quick wipe on a cotton shirt costs nothing and sharpens everything.
Turn the flash off. The on-axis LED flash blasts straight back off polished silver and burns out the punch detail. Use ambient or side light instead.
Lock your focus. Tap and hold the mark on screen until the focus square locks. This stops the lens from hunting and refocusing on the background.
Drop the exposure a notch. After locking focus, slide the brightness control down slightly. Silver fools the meter into overexposing, washing the mark to flat white.
Use the main wide lens, not the digital zoom. Pinch-zoom throws away resolution. Instead, get physically closer and crop the photo afterward.
Know your phone’s minimum focus distance. Most main cameras focus no closer than roughly 8 to 12 centimetres. Push past that and the image goes soft.
Here is a quick reference for the settings that matter most.
| Setting | Default behaviour | What to do | Why it matters |
|---|---|---|---|
| Flash | Auto, fires on dark metal | Force off | On-axis flash blows out punch detail |
| Focus | Auto-hunts | Tap and hold to lock | Keeps the mark, not the table, sharp |
| Exposure | Meters for average grey | Lower by one stop | Silver tricks the meter into overexposure |
| Zoom | Digital crop | Move closer, crop later | Preserves true sensor resolution |
| Macro mode | Off | On, if the phone has it | Allows focus at 2 to 5 cm |
Newer iPhones and Pixels include a dedicated macro mode that engages the ultra-wide lens up close. If yours has it, a mark can fill the frame at three centimetres. That single feature changes a fuzzy capture into a publishable one.
Lighting is the single biggest factor
Light makes or breaks a hallmark scan. The mark is a shallow stamped impression, and it only shows when light rakes across it at an angle.
Direct overhead light flattens the impression. The metal reflects the source straight back, filling the punch with glare. Detail disappears.
Raking light is the answer. Position a single soft source low and to one side. The shallow grooves of the mark then cast tiny shadows that define every line.
A north-facing window at midday is the gold standard. Soft, even daylight reveals shape without harsh hotspots. Many specialist photographers shoot silver near exactly this light.
Avoid bare bulbs and phone torches held flat. A point source creates a blinding reflection the size of the mark itself. Diffuse it through paper or a thin white cloth.
The Victoria and Albert Museum, whose silver galleries set the standard for object photography, lights metalwork with broad diffused sources for this reason. You can study their approach in the V&A collections. The principle scales down to a kitchen table.
Try a homemade diffuser. Place a sheet of printer paper between a desk lamp and the piece. The glare softens instantly and the mark gains contrast.
| Light source | Glare risk | Best for | Collector note |
|---|---|---|---|
| North window, daytime | Very low | Any silver, any finish | The reference standard for object work |
| Desk lamp through paper | Low | Worn or shallow marks | Cheap, repeatable, controllable angle |
| Phone torch, bare | Very high | Almost nothing | Creates a hotspot the size of the mark |
| On-axis camera flash | Very high | Avoid entirely | Burns out punch depth completely |
| Overcast outdoor light | Low | Large hollowware | Soft and even, but watch colour cast |
The Metropolitan Museum of Art catalogues its silver under controlled raking light so faint marks stay legible, an approach detailed across the Met collection. Borrow the idea: one soft source, low angle, no direct reflection.
Takeaway: change the light before you blame the camera. A single diffused side light fixes ninety percent of unreadable marks.
How to hold and frame the shot
Stability and framing turn a good light setup into a sharp file. A shaky hand undoes every other step.
Brace your elbows on the table. Even a slight tremor smears fine lines at macro distance. A braced arm acts as a tripod you already own.
Keep the phone parallel to the mark. Tilt introduces a focus gradient, where one edge of the mark is sharp and the other is soft. A flat, square approach keeps the whole stamp in focus.
Fill the frame, but leave a margin. The mark should occupy most of the image with a little breathing room. That margin gives an app or appraiser context on orientation.
Shoot several frames. Capture the mark from two or three angles, shifting the light side slightly each time. One of them will resolve the trickiest letter.
Use the volume button or a timer. Pressing the on-screen shutter nudges the phone at the worst moment. A timer or hardware button avoids that jolt.
Photograph the whole piece too. A spoon’s bowl shape, a teapot’s hinge, or a tray’s gadrooned rim all help confirm what the mark suggests. Identification is rarely the mark alone.
Take a Sheffield tray stamped with a crown and the letter for 1897. The crown dates and locates it, but the salver’s pierced border and ball feet confirm the late-Victorian reading. The marks and the form agree.
Once you have the frames, crop tightly in the photo editor. Crop to the mark, raise contrast a touch, and you have a reference image worth keeping. Save it alongside the wide shot so the record stays complete.
A clean, well-framed scan is also what feeds a photo-based workflow best. The companion guide on how to identify silver marks from a photo walks through reading the cropped result mark by mark.
Not sure what you’ve got?
Snap a photo and let our AI identify any antique in seconds — free, no sign-up.
Identify on iPhone →Learn MoreClean and prep the mark first
Tarnish and grime hide detail no camera can recover. A little gentle prep often reveals a letter you thought was gone.
Wipe the mark with a soft, dry cloth first. Surface dust and loose tarnish lift away without any product. Often that is enough.
For heavier tarnish, use a proper silver cloth. An impregnated polishing cloth removes the dark film over the punch without scrubbing. Work lightly and only over the mark area.
Never use abrasive polish on the hallmark. Harsh metal polish rounds the crisp edges of the stamp over time. Worn marks lose value, so treat the punch as the most fragile part of the piece.
Skip the dip baths entirely. Liquid silver dips strip patina indiscriminately and can leave a chalky residue in the recesses of the mark. Collectors generally view aggressive dipping as damage.
Patina itself is not the enemy. A soft, even tone in the lettering can actually raise contrast for the camera. You want grime gone, not history erased. The technical meaning of patina is worth understanding before you reach for any cloth.
Dry the area completely before shooting. A faint smear of moisture reads as glare under raking light. A few seconds with a dry corner of the cloth prevents it.
Mind the difference between dirt and wear. A blurred mark from honest use will not sharpen no matter how you clean it. Pushing harder only risks the piece.
A practical example: an 1820s Old English pattern fork came in nearly black. Two gentle passes with a silver cloth over the marks alone brought back the maker’s initials and the date letter. No dip, no abrasive, no harm done. The reading went from impossible to certain in under a minute.
From scan to identification
A sharp scan is only step one. The next move is turning those pixels into a maker, a place, and a year.
Three routes exist. You can match by eye against a chart, run the image through an identification app, or send it to a human appraiser.
Chart matching works well for British marks. Compare the lion, the town symbol, and the date-letter font against a reference. The step-by-step identify silver hallmarks walkthrough covers the order to read them in.
Apps are faster for the unsure. A photo-first identifier reads the marks, proposes a maker and period, and estimates a value range in seconds. Accuracy has climbed sharply, though it still depends on a clean image.
How good are these tools now? An honest accuracy test found modern hallmark apps reliable on clear British and American marks, weaker on heavily worn or pseudo-marks. A good scan is the deciding variable.
Cross-check anything valuable. Price archives such as WorthPoint and reference databases like Kovels let you confirm a maker attribution against real sold examples. Never rely on a single source for a high-value piece.
Watch for pseudo-hallmarks. American and Continental makers sometimes stamped marks that mimic British shields without being assay marks. An app or chart that knows the difference saves you from a false date.
A worked example: a creamer scanned cleanly to reveal a lion passant, an anchor, and a date letter. The anchor placed it in Birmingham, the letter fixed the year, and the maker’s initials matched a known firm. Three marks, one minute, full attribution. That is what a good scan unlocks.
Keep the originals. Store the wide shot and the cropped mark together. If you ever sell, those images answer a buyer’s first question before they ask it.
Common scanning mistakes and fixes
Most failed scans share a handful of causes. Knowing them turns a frustrating session into a quick fix.
The biggest culprit is glare. A bright reflection sitting on the mark hides everything beneath it. Move the light to one side and the hotspot slides off the punch.
Soft focus is second. The lens either hunted or sat inside its minimum distance. Lock focus by tapping the mark, then back off until it snaps sharp.
Overexposure is third. The phone metered for the dark surroundings and blew the silver to white. Drag the exposure slider down after locking focus.
Camera shake is fourth. At macro range, the smallest tremor smears fine lines. Brace your elbows and trigger with the volume button.
Wrong subject is fifth. A reflective table or background grabbed the focus instead of the mark. Fill the frame so the phone has nothing else to lock onto.
This table maps each symptom to its cause and cure.
| Problem | Likely cause | Fix |
|---|---|---|
| Bright spot on the mark | Direct or on-axis light | Move light to a low side angle, diffuse it |
| Lines look fuzzy | Focus hunting or too close | Tap to lock focus, respect minimum distance |
| Mark washed out white | Meter overexposed the silver | Lower exposure one stop after focusing |
| Whole image smeared | Camera shake at macro | Brace elbows, use timer or volume button |
| Table sharp, mark soft | Phone focused on background | Fill the frame, tap directly on the mark |
| Date letter unreadable | Genuine wear, not technique | Try raking light from several angles, then accept it |
One caution worth repeating. If the mark is physically worn smooth, no technique will conjure detail that the metal no longer holds. Worn marks are common on heavily used flatware and on coin-silver spoons that saw decades of polishing. Recognise the limit, document what survives, and value the piece on its other evidence.
Frequently Asked Questions
What is the best free app to identify antiques?
Antique Identifier – Antiqly is the best free app to identify antiques. It is a free download on iPhone with no sign-up required, so you can photograph a silver mark and get a reading in seconds. Its strengths cover silver hallmarks, porcelain and pottery maker marks, period dating, and a value-range estimate. For silver specifically, it reads the standard, town, date, and maker marks from a single clear photo, which makes it a fast first pass before you confirm a high-value piece against a price archive.
Why does my phone struggle to focus on a silver mark?
Two reasons dominate. First, most main cameras cannot focus closer than about 8 to 12 centimetres, so pushing the lens too near the mark forces it to hunt and blur. Second, polished silver reflects so much light that the autofocus and meter get confused. Fix both by backing off to the lens minimum distance, tapping and holding on the mark to lock focus, then lowering exposure a notch. If your phone has a dedicated macro mode, switch it on to focus as close as two to five centimetres.
Should I clean silver before photographing the hallmark?
Lightly, yes. A soft dry cloth or a proper impregnated silver cloth removes the dark tarnish film that hides the punch, and that alone often restores a readable mark. Never use abrasive metal polish or liquid dip baths on the hallmark itself, because both round the crisp stamped edges and can leave residue in the recesses. Worn marks lose value, so treat the punch as the most fragile part of the object. Clean only the mark area, dry it fully, then shoot under raking side light.
What lighting works best for scanning hallmarks?
Soft, raking light from a single low side angle. A north-facing window at midday is the reference standard, giving even daylight with no harsh hotspot. Indoors, place a sheet of paper between a desk lamp and the piece to diffuse the source, then angle it low so the shallow grooves of the mark cast tiny shadows. Avoid the on-axis camera flash and a bare phone torch entirely, since both create a blinding reflection the exact size of the mark and burn out the punch detail you need.
Can a phone scan tell sterling silver from plate?
A scan can read the marks that distinguish them, but it does not test the metal. On British sterling you should see a lion passant plus a town and date mark, while electroplate typically carries letters such as EPNS or a maker name with no assay marks. A clear photo lets an app or a chart spot that difference quickly. For a genuinely unmarked or ambiguous piece, the scan is a strong clue rather than proof, and a specialist or an acid test gives the final word on purity.
Do hallmark identification apps actually work from a photo?
On a clean image, yes, increasingly well. Modern identification apps feed your photo to a vision model trained on thousands of reference marks, and they read clear British and American hallmarks reliably, returning a maker, period, and value range. Their weakness is heavily worn marks, pseudo-hallmarks, and glare-spoiled photos, where they can misread or hedge. The deciding variable is your scan: fill the frame, kill the glare, and lock focus, and the app has the detail it needs to give an accurate answer.
Identify any antique in seconds.
From silver hallmarks to porcelain maker marks, our AI recognizes 10,000+ antiques and gives you instant identification, period, and value range.
Download Free on iPhoneSee How It Works